Choosing Power Tiller Parts in 2026 requires more than comparing prices online. A part may look identical, yet its shaft diameter, mounting holes, or rotation direction can differ. That small mismatch can damage a gearbox, reduce field performance, or create unnecessary downtime.
This guide focuses on practical selection methods developed from real maintenance work. It explains how to check model numbers, machine dimensions, operating conditions, and manufacturer recommendations before ordering. A worn tine in dry soil needs different attention from a belt working through wet, heavy clay. Material quality also matters. Hardened steel tines, sealed bearings, and reinforced belts usually offer better service when the machine faces frequent use.
Check every measurement.
Reliable decisions begin with accurate information. Use the owner’s manual, equipment plate, service records, and trusted dealer documentation together. Original parts often provide the safest fit, while reputable aftermarket options can reduce costs when specifications are verified. Still, no checklist is perfect. Manuals may be outdated, previous repairs may have changed the machine, and online listings sometimes contain incomplete data. Measure the old component carefully, but do not assume it was correct.
The following sections will help readers evaluate Power Tiller Parts by function, compatibility, durability, and total operating value. They will also address warning signs, common purchasing mistakes, and questions worth asking before installation. A thoughtful choice protects the machine, supports safer cultivation, and prevents a low-priced part from becoming an expensive repair.
A power tiller works reliably when each part matches its workload, soil conditions, and machine specifications. The engine supplies power, while the transmission controls speed and torque. Belts, chains, and gears transfer that force to the wheels or rotary blades. I always inspect these components together, because replacing one worn part can expose another weakness.
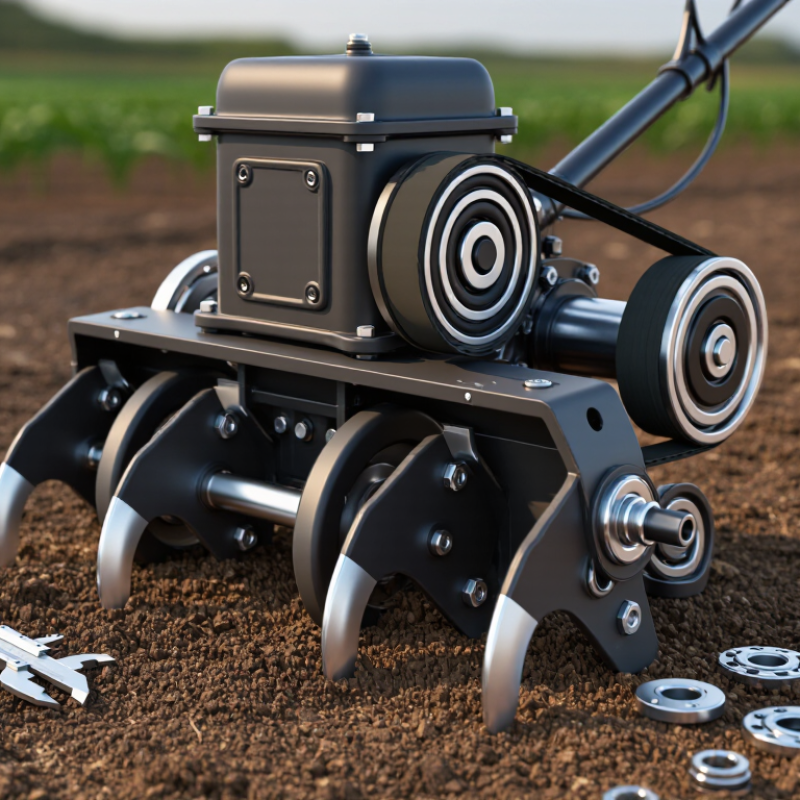
The rotary shaft carries blades through hard soil. Strong, correctly sized blades cut and mix the ground without excessive vibration. Tines need suitable thickness, mounting holes, and rotation direction. A clutch connects or disconnects power safely, while bearings support rotating shafts and reduce friction. Seals keep dust and moisture away from sensitive areas. Small parts matter.
When choosing replacements in 2026, compare measurements rather than appearance alone. Check shaft diameter, bolt spacing, belt profile, material grade, and operating temperature. Use the equipment manual and service records as primary references. A qualified technician can verify unclear dimensions with calipers and alignment tools.
I once selected a visually identical belt that slipped under load. That mistake reminded me to check tension ratings, not just length. It is easy to overlook.
Reliable parts should include traceable specifications, clear installation guidance, and suitable safety testing. Avoid forcing a component into place. A tight fit is not always a correct fit. Regularly inspect fasteners, lubrication points, guards, and unusual noise before fieldwork.
How to Choose Power Tiller Parts in 2026?
Identifying Your Power Tiller’s Model and Specifications
Before ordering parts, locate the identification plate on the frame or transmission housing. Record the model code, serial range, rated power, engine displacement, and production year. A faded plate can mislead you. Photograph it after removing dust and oil.
The plate usually lists transmission type, axle size, and clutch details. Measure shaft diameter with calipers, not a ruler. Record bore size, keyway width, bolt spacing, and thread type. Check whether the clutch is dry or wet. Small differences can prevent installation. They matter.
A 2024 Fortune Business Insights report estimates the agricultural machinery market at over 190 billion US dollars in 2023. Its forecast also shows continued growth through 2032. More equipment creates more replacement choices, but compatibility risks increase too. FAO’s 2023 Statistical Yearbook reports that agriculture employed about 26% of the global workforce in 2022, highlighting the importance of dependable field equipment.
Ask the supplier to match dimensions with the service manual and parts diagram. Confirm rotation direction, mounting position, and gear material. Check sealing surfaces for grooves before buying a new seal. I would recheck every measurement after cleaning rust. Catalog photographs remain unreliable. Use them only for visual comparison.
Before ordering replacement parts, record the exact model code, engine displacement, power rating, transmission type, shaft diameter, belt dimensions, and working width. The chart shows common mechanical horsepower ratings converted to kilowatts using the standard conversion of 1 mechanical horsepower = 0.7457 kW. Match the rating and specifications on your machine’s identification plate or owner’s manual.
Matching parts with compatibility and performance requirements starts with measured evidence, not appearance. FAO’s 2023 Statistical Yearbook reported that agriculture employed 26.1% of the global workforce in 2022. Reliable equipment therefore depends on dependable replacement decisions, especially for small farms.
Record the tiller’s engine model, shaft diameter, keyway size, bolt spacing, belt profile, and rotation direction. A part can look identical yet fail after several hours of vibration. Check the service manual and compare measured dimensions with the supplier’s technical sheet.
ISO 26322-1:2010 provides safety requirements for pedestrian-controlled tractors, including controls and guarding. These details matter when selecting clutches, blades, shields, and drive components.
Performance needs equal attention. FAO has reported that small-scale farmers produce roughly one-third of the world’s food, so downtime can affect tight production schedules. Choose blades according to soil hardness, working width, and expected operating depth. Match belts and bearings with heat, dust, and continuous-load ratings. Do not rely only on a higher load rating; excessive stiffness may increase vibration. I have seen a “stronger” part create faster wear elsewhere. That mistake is easy to repeat.
Before installation, inspect alignment with a straightedge and check free movement by hand.
Test the machine at low speed first. Keep the old part for comparison, but question its wear pattern. It may reveal an underlying alignment problem, not just a failed component.
Evaluating Material Quality, Durability, and Operating Conditions
When choosing power tiller parts, match the material to the work, not just the price. Quality begins with accurate dimensions and consistent metal strength. Forged steel suits shafts, gears, and high-load fasteners because it handles repeated stress. Heat-treated surfaces can reduce wear on gear teeth. However, excessive hardness may cause brittle failure. Balance matters.
Operating conditions change the correct choice. Dry, dusty fields can damage unprotected bearings and seals. Wet soil increases corrosion and places heavier loads on the transmission. Choose sealed bearings for dusty areas and corrosion-resistant fasteners for damp storage. Check the part’s temperature rating when working in hot weather. Small details matter.
Durability also depends on fit. A strong gear will fail quickly if its teeth do not align correctly. Measure shaft diameter, keyway size, thread pitch, and mounting distance before ordering. I once selected a thicker replacement part, expecting longer service. It did not fit properly. That decision was wrong. The experience taught me to verify measurements instead of trusting appearance. Inspect edges, welds, and machining marks under good light. Replace parts showing cracks, deep scoring, or unusual looseness. Follow the equipment manual and maintenance records when available. A practical choice is rarely the heaviest one.
Choosing power tiller parts in 2026 requires more than matching a model number. Measure shaft diameter, keyway shape, bolt spacing, belt length, and bearing dimensions. A part can look correct yet fail after several hours of field vibration. The 2022 U.S. Census of Agriculture recorded nearly 1.9 million farms, showing how varied equipment conditions can be. Confirm the machine’s production year and transmission layout before ordering. Take photos with a ruler beside the worn component.
Installation needs deserve equal attention. Check whether the replacement requires pullers, torque tools, electrical testing, or gearbox adjustment. A simple-looking clutch may demand precise alignment. Follow the service manual’s torque values, not guesswork. MarketsandMarkets’ 2024 agricultural equipment report projects steady market growth through 2029, which may increase the number of compatible aftermarket parts. More choice is useful, but confusing.
Warranty language reveals supplier reliability. Look for written coverage periods, proof requirements, return conditions, and support for installation questions. Ask whether the warranty covers premature wear or only manufacturing defects. Keep invoices and installation photos. The FAO’s 2023 statistical reporting emphasizes the importance of productivity in small-scale agriculture, where downtime can quickly affect income. I have learned that the cheapest part is rarely the lowest-cost decision. Still, warranty promises can be vague. Read every exclusion. A supplier that provides dimensional drawings, batch information, and responsive technical support deserves greater trust.
| Part Category | Key Fit Checks | Typical Installation Needs | Important Specifications | Expected Service Considerations | Recommended Warranty Check | Supplier Reliability Evidence | Typical Lead Time | Purchase Risk |
|---|---|---|---|---|---|---|---|---|
| Tiller Blades and Tines | Match mounting-hole pattern, tine rotation, working width, shaft direction, and left/right configuration. | Usually requires basic hand tools; inspect guards, fasteners, and tine spacing before operation. | Steel grade, blade thickness, hole diameter, pitch, and cutting profile. | Wear is affected by soil type, stones, working depth, and operating speed. | Confirm coverage for manufacturing defects and whether normal wear, bending, or impact damage is excluded. | Dimensional drawings, material information, inspection records, and clear replacement policy. | Common stock items: 3–10 business days; made-to-order sets may take 3–8 weeks. | High if the hole pattern or rotation direction is incorrect. |
| Drive Belts | Verify belt profile, effective length, pulley width, center distance, and tension-adjustment range. | Requires removal of guards and correct tensioning; pulleys should be aligned before fitting. | Belt section, length tolerance, oil resistance, temperature range, and reinforcement type. | Check for glazing, cracks, fraying, slipping, or abnormal vibration during routine maintenance. | Check whether warranty applies to premature cracking or dimensional defects rather than incorrect tension or contamination. | Traceable size markings, batch information, dimensional test data, and technical support. | Usually 2–7 business days for standard sizes. | Medium to high if the profile or length is mismatched. |
| Clutch Cable and Control Cable | Compare overall length, inner-wire travel, end fittings, threaded adjuster, and routing clearance. | Generally simple to install, but correct routing and free play adjustment are essential. | Outer-sheath length, inner-wire diameter, end-stop shape, corrosion resistance, and minimum bend radius. | Inspect for kinks, stiffness, broken strands, damaged boots, and loss of adjustment range. | Ask whether cable seizure, water ingress, and premature strand failure are covered. | Installation instructions, accurate end-fitting photos, dimensional drawings, and responsive after-sales support. | Commonly 3–14 business days. | Medium; incorrect length can prevent safe clutch operation. |
| Air Filter Assembly | Match housing shape, mounting points, intake diameter, sealing surface, and filter element dimensions. | Usually bolt-on; clean the filter seat and confirm that the cover seals evenly. | Filtration media, airflow capacity, gasket material, housing strength, and dust-sealing design. | Replace or clean according to operating conditions; dusty environments require more frequent inspection. | Confirm coverage for damaged housings, missing seals, and manufacturing defects. | Filter efficiency data, fitment drawings, batch traceability, and documented quality checks. | Usually 3–10 business days. | Medium; poor sealing can allow abrasive dust into the engine. |
| Carburetor or Fuel System Parts | Verify engine displacement, mounting flange, gasket pattern, fuel-line size, choke linkage, and jet configuration. | May require fuel-system cleaning, linkage adjustment, leak testing, and idle-speed tuning. | Float material, jet sizes, gasket composition, fuel compatibility, and corrosion resistance. | Fuel quality, storage conditions, ethanol exposure, and blocked passages strongly affect service life. | Check exclusions for contamination, incorrect adjustment, fuel damage, and installation-related leaks. | Leak-test procedure, dimensional data, spare gasket availability, and technical troubleshooting support. | Standard assemblies: 5–15 business days; specialized configurations may take longer. | High because fuel leaks and incorrect mixture settings create safety and performance risks. |
| Gearbox Gears and Shafts | Confirm tooth count, module or diametral pitch, shaft diameter, keyway, gear width, and rotation direction. | Often requires partial or complete gearbox disassembly, bearing inspection, shimming, and oil replacement. | Steel hardness, heat treatment, runout, tooth accuracy, surface finish, and load rating. | Incorrect backlash, lubrication, or alignment can cause noise, overheating, and rapid tooth wear. | Require written coverage for dimensional errors, hardness defects, and premature tooth failure. | Material certificates, hardness reports, inspection measurements, drawings, and replacement-part availability. | Stock parts: 1–3 weeks; precision or custom parts: 4–10 weeks. | Very high because a mismatch can damage the complete transmission. |
| Bearings and Oil Seals | Match bearing number or dimensions, clearance class, seal type, shaft fit, housing fit, and operating speed. | Requires correct extraction and pressing methods; avoid applying force through the rolling elements. | Bore, outside diameter, width, clearance, seal material, temperature range, and lubricant compatibility. | Monitor noise, heat, play, seal leakage, and contamination during scheduled maintenance. | Confirm coverage for material or manufacturing defects and clarify exclusions for incorrect mounting. | Packaging integrity, dimensional inspection, batch traceability, and storage guidance. | Often 3–14 business days for common dimensions. | Medium to high if clearance, seal type, or installation method is wrong. |
| Wheels, Hubs, and Axle Components | Check rim diameter, width, bolt pattern, axle diameter, keyway, offset, and tire clearance. | Requires safe lifting, correct torque, retaining hardware, and verification of wheel alignment. | Load capacity, hub material, axle strength, corrosion protection, and tire compatibility. | Inspect fasteners, hub play, cracks, deformation, tread condition, and inflation pressure. | Check coverage for cracks, deformation, and manufacturing faults; impact damage is often excluded. | Load-rating documentation, dimensional drawings, weld inspection, and replacement hardware support. | Common assemblies: 1–4 weeks depending on size and configuration. | High because incorrect load or fit can affect stability and operator safety. |
| Engine Mounts and Vibration Isolators | Compare mounting-hole spacing, bolt size, mount height, rubber hardness, and engine alignment. | Requires support for the engine and accurate tightening; alignment should be checked after installation. | Rubber compound, compression rating, metal-plate thickness, bolt grade, and temperature resistance. | Look for cracking, compression set, excessive vibration, loose hardware, and misalignment. | Confirm warranty coverage for rubber separation, incorrect hardness, and defective bonding. | Load data, rubber-material information, dimensional inspection, and consistent batch quality. | Usually 1–3 weeks. | Medium to high if vibration or alignment problems are not corrected. |
| Electrical Switches and Wiring | Verify voltage, current rating, connector type, terminal layout, wire length, polarity, and mounting dimensions. | Requires battery disconnection, correct routing, insulation protection, and functional testing. | Voltage rating, contact rating, insulation temperature, ingress protection, wire gauge, and connector retention. | Inspect for corrosion, loose terminals, chafing, damaged insulation, and moisture entry. | Check whether warranty covers contact failure, faulty connectors, and insulation defects. | Electrical test results, wiring diagrams, connector specifications, and documented replacement support. | Typically 5–20 business days. | High if voltage or current ratings are unsuitable. |
2026 Purchasing Checklist
Confirm the part number or complete dimensions, request an installation drawing, verify material and load specifications, obtain warranty terms in writing, check return conditions, and assess supplier reliability through traceability, technical support, inspection records, and consistent delivery performance. Lead times shown are typical planning ranges and should be confirmed before ordering.
You are using an outdated browser. Things may not appear as intended. We recommend updating your browser to the latest version.
Close